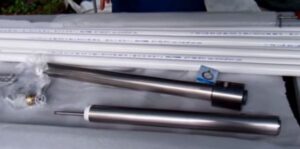
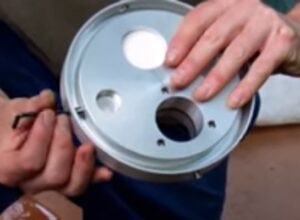
This article explains how you can make a DIY hand pump for your well.
- Time Needed: 4-6 hours
- Difficulty Level: Easy
Before we begin, you must make sure that your well cap and well pump are compatible with a hand pump. You also need to know the static water level in the well, so you can have the pipes cut accordingly. If you don’t know about the static water level, you can use a steel tape to measure the water level. You can read more about the static water level here.
Let’s get started!

Foot Valve – A foot valve prevents water from falling back once it has entered the cylinder. You can either buy a foot valve or make one for yourself. Setting up a foot valve is a complicated process, and the success of the system depends upon its working. It is composed of the following parts.
- 2-inch cap
- 2-inch pipe screen with drilled holes (about 9-inch long)
- 2-inch coupler
- 2×3/4 reducer
- 2×3/4 reducer with the lip filed out to allow the 3/4 inch pipe to slide all the way through.
- 2-inch coupler
- ¾-inch pipe (about 4-inch long)
- ¾-inch slip-male thread adapter
- ¾-inch brass check valve
- 2-inch pipe about 36-inch long, it fits into the coupler.
Source: wikihow
We suggest that you buy one from a nearby hardware store. Assembling it will need a lot of technical knowledge and skill. A little mistake can result in the failure of the pump.

Plunger Assembly – It provides the suction force and acts as a second check valve to push the water in the upper cylinder. Assembling a plunger assembly also needs technical knowledge and skills. We suggest that you buy one from the market and use it for assembling. The following setup and tools will help you assemble a plunger assembly at home.
- 3/4-inch threaded pipe extender, screws into the bottom of the check valve
- Spacers: The purpose of the spacers is to keep the gasket rigid. They should not contact the cylinder. You can use a 2-inch hole saw to score a ring on each side, then use a 1-1/8-inch Forstner bit to bore out the inner hole. The hole saw can be again used to finish the outer cut. These can be made from wood or plastic
- Leather gasket: It can also be made from rubber. Carefully cut this to fit snugly in the cylinder and on the pipe extender. When inserting the assembly in the cylinder to test the fit, first soften the leather with water. Otherwise, you will trim it too small and need to start over
- ¾-inch brass check valve
- ¾-inch slip-male thread adapter
- ¾-inch pipe 6-inch long with drilled holes. This allows water to enter the upper cylinder after passing through the check valve
- 3/4×1/2-inch slip reducer
- Rubber stopper: Held in place by the 1/2 inch pipe, it prevents water from coming up the pipe
- ½-inch pipe
Source: wikihow
Once you have assembled or purchased a foot valve and a plunger assembly, the next step is to identify the pipe needs.
Read More: How to Pump Water from a Well without Electricity?
Connection Pipe – We hope that you have already measured the static water level in the well. You need to make sure that the foot valve and the cylinder are immersed in the water in your well. You may want to use a thinner diameter PVC pipe to cut some cost on the project.
Pump Head Assembly – It is used to divert water coming out from the well to the spigot. You must buy a high-quality pump head assembly and make sure it is free from lead. You can also build a PVC head assembly, but it won’t last long. Selecting a rust-free head assembly will make your pump durable and will not impact the quality of water. Buying a readymade head assembly will also relieve you of the tension of building a handle and lever arm. They are used to generate the force needed to pull water from the well.
PVC Protection – Using a metallic head assembly gives you protection from UV rays. PVC is prone to damage from UV rays. UV rays can weaken the cemented joints. If there are any exposed PVC parts, protect them by spraying with opaque paint. Opaque paints don’t absorb UV rays.
Also Read: Is Well Water Safe to Drink after a Power Outage?
Final Words
Before making and installing a hand pump:
- Make sure that your state allows you to perform modification or alteration works on your well.
- If not, hire a licensed driller and ensure that he meets all the criteria outline by local authorities. You must also ensure that all the equipment used in making the well pump is disinfected before immersion in the well.
- If you notice any difference in water taste, smell, and appearance. Get your water tested immediately from a licensed testing facility.
